Hey Girlie Girls!Thanks for visting my Blog please look to the right side of my posts to see my other blogs and enjoy this blog which is all about all kinds of girlie DIYS and even more beauty stuff! src='https://ajax.googleapis.com/ajax/libs/jquery/1.9.1/jquery.min.js'/> Body Wikplayer http://www.wikplayer.com --> https://www.youtube.com/watch?v=hT_nvWreIhghttps://www.youtube.com/watch?v=hT_nvWreIhghttps://www.youtube.com/watch?v=hT_nvWreIhgWikplayer http://www.wikplayer.com --> src="http://www.wikplayer.com/code.js" data-config="{'skin':'skins/wikfull/funkyLady/skin.css','volume':50,'autoplay':true,'shuffle':true,'repeat':0,'showcomment':false,'marqueetexton':true,'placement':'top','showplaylist':true,'playlist':[{'title':'All%20About%20That%20Bass%20Meghan%20Trainer%20','url':'https%3A%2F%2Fwww.youtube.com%2Fwatch%3Fv%3D7PCkvCPvDXk'},{'title':'Animals%20by%20Marron%205','url':'https%3A%2F%2Fwww.youtube.com%2Fwatch%3Fv%3D7BJ3ZXpserc'},{'title':'Best%20Day%20Of%20My%20Life%20by%20American%20Authers','url':'https%3A%2F%2Fwww.youtube.com%2Fwatch%3Fv%3DY66j_BUCBMY'},{'title':'Blank%20space%20by%20Taylor%20Swift','url':'https%3A%2F%2Fwww.youtube.com%2Fwatch%3Fv%3De-ORhEE9VVg'},{'title':'Dark%20Horse%20by%20Katy%20Perry','url':'https%3A%2F%2Fwww.youtube.com%2Fwatch%3Fv%3D0KSOMA3QBU0'},{'title':'Fancy%20by%20Iggy%20Azalea%20ft%20Charli%20XCX','url':'https%3A%2F%2Fwww.youtube.com%2Fwatch%3Fv%3DO-zpOMYRi0w'},{'title':'Jealous%20by%20Nick%20Jonas','url':'https%3A%2F%2Fwww.youtube.com%2Fwatch%3Fv%3Dyw04QD1LaB0'},{'title':'Lips%20Are%20Movin%20by%20Meghan%20Trainer','url':'https%3A%2F%2Fwww.youtube.com%2Fwatch%3Fv%3DqDc_5zpBj7s'},{'title':'Love%20Me%20Harder%20by%20Ariana%20Grande','url':'https%3A%2F%2Fwww.youtube.com%2Fwatch%3Fv%3Dg5qU7p7yOY8'},{'title':'Lucky%20Strike%20by%20Maroon%205','url':'https%3A%2F%2Fwww.youtube.com%2Fwatch%3Fv%3DcuYoHikgEro'},{'title':'Night%20Changes%20by%20One%20Direction','url':'https%3A%2F%2Fwww.youtube.com%2Fwatch%3Fv%3DsyFZfO_wfMQ'},{'title':'Really%20Don%27t%20Care%20by%20Demi%20Lovato','url':'https%3A%2F%2Fwww.youtube.com%2Fwatch%3Fv%3Dw7LbW9sXQ5s'},{'title':'Rude%20by%20Magic','url':'https%3A%2F%2Fwww.youtube.com%2Fwatch%3Fv%3DY66j_BUCBMY'},{'title':'Shake%20it%20off%20by%20Taylor%20Swift','url':'https%3A%2F%2Fwww.youtube.com%2Fwatch%3Fv%3DnfWlot6h_JM'},{'title':'Steal%20my%20girl%20by%20One%20Direction','url':'https%3A%2F%2Fwww.youtube.com%2Fwatch%3Fv%3DUpsKGvPjAgw'},{'title':'Umbrella%20by%20Rihanna','url':'https%3A%2F%2Fwww.youtube.com%2Fwatch%3Fv%3DY66j_BUCBMY'},{'title':'Fancy%20by%20Iggy%20Azalea%20ft%20Charli%20XCX','url':'https%3A%2F%2Fwww.youtube.com%2Fwatch%3Fv%3DO-zpOMYRi0w'},{'title':'Chandelier%20by%20Sia','url':'https%3A%2F%2Fwww.youtube.com%2Fwatch%3Fv%3D2vjPBrBU-TM'},{'title':'Ooh%20La%20La%20by%20Britney%20Spears','url':'https%3A%2F%2Fwww.youtube.com%2Fwatch%3Fv%3DNVcSNnqRD0c'},{'title':'Cups%20by%20Anna%20Kendrick','url':'https%3A%2F%2Fwww.youtube.com%2Fwatch%3Fv%3DcmSbXsFE3l8'},{'title':'Roar%20by%20Katy%20Perry','url':'https%3A%2F%2Fwww.youtube.com%2Fwatch%3Fv%3DCevxZvSJLk8'},{'title':'Burn%20by%20Ellie%20Goulding','url':'https%3A%2F%2Fwww.youtube.com%2Fwatch%3Fv%3DCGyEd0aKWZE'},{'title':'Last%20Friday%20Night%20by%20Katy%20Perry','url':'https%3A%2F%2Fwww.youtube.com%2Fwatch%3Fv%3DKlyXNRrsk4A'},{'title':'Don%27t%20Stop%20Believing%20by%20Glee','url':'https%3A%2F%2Fwww.youtube.com%2Fwatch%3Fv%3D1FaJshIWdpU'},{'title':'California%20Gurls%20by%20Katy%20Perry','url':'https%3A%2F%2Fwww.youtube.com%2Fwatch%3Fv%3DF57P9C4SAW4'},{'title':'Up%20All%20Night%20by%20One%20Direction','url':'https%3A%2F%2Fwww.youtube.com%2Fwatch%3Fv%3DJ26jFj_sC4s'}]}" > src="http://www.animationbuddy.com/Animation/Nature/Rainbows/Rainbow_2.gif" border="0" alt="Click to get cool Animations for your MySpace profile" />
MySpace Codes! Cute Bow Tie Hearts Blinking Blue and Pink Pointer

Sunday, November 30, 2014

DIY storage for stuff!

Hey Girlie Girls! Sorry I haven't been posting I just didn't have time on vacation! We had a lot of fun we saw a Macy's tradition Christmas tree lights. And the bell of liberty and more fun stuff! I went to Philadelphia. We'll anyway today I wanted to show u a cute storage item for pencils ,makeup ,and more! So first up lets go to the dollar section in Target! Pickup a little pencil storage box any design. Then store anything u want in it. I know it was pretty simple but I just thought it would be helpful for some of u. Well hope y'all enjoyed xoxo-The Beauty Queen.

Friday, November 28, 2014

DIY box storage!!

Hey Girlie Girls!! It's the beauty Queen and today I decided to do a post on how to make a storage box!! So first cut 24 long pieces of cardboard. Glue them into boxes and glue the extra 4 pieces. Then cut a big enough square to take up the bottom space. Then glue all the bottoms together out a the 3 boxes and ur done.And I. Inserted a pic of the final product.

Thursday, November 27, 2014

Framed Art Work!!

Hey Guys!! Right now I'm posting on my phone from my hotel! And today I wanted to show y'all a great way to show art work in your room We'll let's get started!!!     

                  What You'll Need 
                   1. An old drawing that would look good in your room or just make a new drawing.
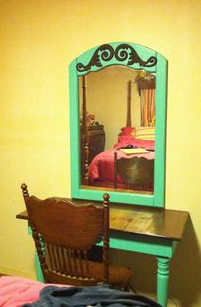
                   2. A frame that fits your drawing.

                   Step by step!
                   Just frame your drawing.

 Hey guys thx for reading my post hope y'all enjoy xoxo-The Beauty Queen.

Other Blogs!

Hey Girlie Girls!! Unfourntely I do not have time to post a DIY right now. But maybe later today. I just have other blogs that I would like y'all to check out :)


                                Links To Other Blogs!
                                 Kit Cat Care
                                  Dolls stuffed animals
                                  Traveling
                                   Caring for brothers


                          And I will be making an Elf on Shelf blog and I will post Every day where my elf has moved and tips and tricks and fun things to do with them and names. Well im OUT PEACE:)

Wednesday, November 26, 2014

Spice up your laptop case!!!

Hey guys!!! Sorry I haven't been posting google was locking me out. But I'm back!! And I would just like to let Ya'll know that maybe for  2 days no post because I will be going on vacation. But if my stupid phone will work then yes I will be posting! Well guys today DIY will only apply to people with laptops like me!! Well i'm posting on a computer but i have a laptop as we'll. Hope y'all enjoy!!


                                          What You'll need!!
                                         1.Laptop case obviously.
                                          2.Ducktape.

                                         3.  sissors.
                                         And thats about it.

                                             Step by step!!
                                             1. Cut your duck tape and do whatever color designs, patterns, or colors you 
like and if you can't thing of anything color look up some cool ones.

         Hey guys thx for reading my blog hope you enjoy my blog xoxox-the beauty queen


Sunday, November 23, 2014

StarBucks Makeup Brush Storage DIY!!!

Hey Girlie Girls!!! And those of you who love Starbucks Your going to love todays DIY!!!!!!!!!

                                                    What You'll Need!
                                                     1.Starbucks cup without lid and empty.

                                                      2. Makeup Brushes Obivouisly
                                                       3. And your gonna want your brushes to stay in place so listen to these steps.                                               4.This is gonna sound weird but put 1 or 2 sponges in the cup.
                                                        5.Sissors or Something sharpe that pokes wholes through.
                                                         6. Super Glue.
                                                          7. If you don't like the color of the sponges you could always paint them so if you want to then paint and paint brush.


                                                                  Step By Step!
                                                                   1.Put 1 sponge in.

                                                                    2.If you doing 2 glue them together.
                                                                     3. Glue bottom of sponge to bottom of cup.
                                                                     4. Wait an hour less or more for it to dry.
                                                                      5. Then Begin to poke big holes in sponge poke a certain number of holes Make sure theres enough wholes for all the makeup brushes you will be storing in the cup
                                                                       6.Put your Makeup brushes in and your done!!!

             Hey Guys thx for reading my blog and on the bottom of this text  is a picture of a the final product hope you guys enjoyed and guys plz tell your friends bout this blog ok well i got to go bye guys xoxo- The Beauty Queen:)


.


Saturday, November 22, 2014

CUTE RUBBER DUCKY DIY!!!

Hey Girlie Girls!!! Sorry I havent been posting ive just been crazy busy!!! And u guys r probs asking about Rhianna photos. Well there was so many ppl going that they messed up the photos.So we are going to go pick them up tomorrow.Any way heres a cute DIY for thanksgiving hope ya'll enjoy:).


                                                    What you'll need
                                                     1.Colored paper
                                                      2. Rubber duck
                                                      3. Sissors
                                                       4.Hot glue

                                                             Step by step!
                                                              1st. cut peices of paper into rectangles
                                                               2nd. hotglue them onto the duck and ur done enjoy ur craft!
 

                       Hey Guys thx for reading this blog I hope u enjoy ur craft it is so cute and we loved making it well bye Girlie Girls xoxo-The Beauty Queen:)

Tuesday, November 11, 2014

DIY CALLENDER!!!!!!!!!!!!!!!!!!!!

Hey Girlie Girls!! Beauty Queen Here and today I decided to show you guys how to make a Callender.   As your doing this please make sure your using common sense it's a callender just remember that. Hope you enjoy!

                                                               What you'll need.
                                                                 A 14 peices of paper.
                                                                 Sharpie
                                                                  Pencil maybe
                                                                   Stapeler
                                                                    Pictures of whatever you want.
                                                                     Optional markers/stickers.

                                                                    Step by step
                                                                    1. Get paper and staple 14 papers together like a book.
                                                                     2. Make squares on each paper.
                                                                      3. Number the squares
                                                                       4. Write the days of the week on the top.
                                                                       5. if you wanna hang yours up then pot a hole in with a pencil.                                                              6. write in pencil first the months then color it in with markers
                                                                         7. Decorate it including front and back.
                                                                         8. Add stickers and post in pictures.
                                                                          9. And your done!

Thx for reading my post hope you enjoyed and btw heres a pic of a finished 1. And a bye xoxo- the beauty queen.


Monday, November 10, 2014

DIY Cool mirrorr!!!!!!!!!

Hey Girlie Girls!!!!!!!!!!!!!! Its the Beauty Queen here! And today I decided to do a DIY zebra mirorr!!!!


                                                   Heres What You'll Need
                                                    1. Square shaped mirrorr.
                                                     2. 4 long scraps of card board.
                                                      3. scrap book paper.
                                                      4. bottled glue and super glue.
                                                      5. Sissors

                                                      Step By Step!
                                                      1. Super glue cardboard on mirror
                                                       2. cut scrapbook paper into 4 lines.
                                                        3. Glue scrap book paper onto cardboard.
                                                         

 Hey Guys! Thx for reading my post I hope you enjoyed xoxo -The Beauty Queen btw this a pic of a Finished 1:)


Sunday, November 9, 2014

Big News And DIY Vanity!

Hey Girlie Girls!!!!!!!!!!!!!!!!!!!!!!!!! I'm so excited to tell you guys this!!!!!!!!!!!!!!!!!!!! I will be meeting Rihanna on Wednesday!!!!!!!!!!!!!!!!!!!!!!!!!!!!!!!!!!!!!!!!! So yesterday I was playing a game with my friend.And she told me she was meeting Rihanna on Wednesday. And I asked her how and she told me. Then I told my mom. And she went to go do it. Heres how I got to a store that was really close to me was selling Rihanna Perfume.And the 1st 500 costumes get to go meet her on wednesday!!!!!!!!!!!!!!!!!! And I got her Reb'l Fleur perfume it smells so good btw. And I will be posting my picture with her. And her Perfume was like 47$ btw. And we also like got this cute big bag that has an R on it. Well anyway lets get along with the post. So to make your on vanity you really don't need much. Just remember make it something that suits you not other ppl. And not all vanities have to be so pretty and stuff ya know?

                                                             Things You'll Need!
                                                               1. Small Table Maybe Desk.
                                                                2. Small chair.  
                                                                3. Contaniers to fit makeup in.
                                                                 4. Your special touch.

                                                                     Step By Step!!!!!!!!!!!!
                                                                     1.Find a good spot in your room.
                                                                       2.Put your table or desk and chair in that spot.
                                                                         3.Fill your containers with Makeup.
                                                                           4.Add your specal touch And Your Done!!!


                                                   Hey Guys Thx for Reading my blog I hope you enjoyed this post plz comment and follow me thx xoxo - The Beauty Queen and btw this is a picture of someones homemade Vanity. It looks pretty nice right well anyway guys bye!:)


Saturday, November 8, 2014

DIY Small Bulletin Board!

Hey Girlie Girls! Beauty Queen Here! And today I decided to make a small Bulletin Board! 
  

                                                       Heres What You'll Need!
                                                       
                                                     1. Cardboard
                                                      2.Peice Of Paper That Is The Same Size Of Cardboard
                                                       3.Glue (Stick glue will work as well)
                                                        4. Scissors.
                                                         5.A few peices of wire(3 or 2 suggested)
                                                           6. 2 or 4 thumb tacks.
                                                           7. Maybe super glue any type    

                                                                 Step by step!
                                                                  
                                                                  1. get your peice of card board and glue the piece of paper on.
                                                                  2.then get scissors and poke holes in to fit thumbtack heads.   
                                                                   3.then fit the heads in the cardboard.
                                                                    4.And put the wires around the the thumb tacks if it wont stay
                                                                       superglue it.
                                                                       5. then put notes stickers anything u want to decorate it.
    bye guys- xoxo the beauty queen:) btw this is a version of a bigger 1. with out the wire step but if u want the wirees do then if not justx do thumb tacks.