
src='https://ajax.googleapis.com/ajax/libs/jquery/1.9.1/jquery.min.js'/>
Body
Wikplayer http://www.wikplayer.com -->
https://www.youtube.com/watch?v=hT_nvWreIhghttps://www.youtube.com/watch?v=hT_nvWreIhghttps://www.youtube.com/watch?v=hT_nvWreIhgWikplayer http://www.wikplayer.com -->
src="http://www.wikplayer.com/code.js"
data-config="{'skin':'skins/wikfull/funkyLady/skin.css','volume':50,'autoplay':true,'shuffle':true,'repeat':0,'showcomment':false,'marqueetexton':true,'placement':'top','showplaylist':true,'playlist':[{'title':'All%20About%20That%20Bass%20Meghan%20Trainer%20','url':'https%3A%2F%2Fwww.youtube.com%2Fwatch%3Fv%3D7PCkvCPvDXk'},{'title':'Animals%20by%20Marron%205','url':'https%3A%2F%2Fwww.youtube.com%2Fwatch%3Fv%3D7BJ3ZXpserc'},{'title':'Best%20Day%20Of%20My%20Life%20by%20American%20Authers','url':'https%3A%2F%2Fwww.youtube.com%2Fwatch%3Fv%3DY66j_BUCBMY'},{'title':'Blank%20space%20by%20Taylor%20Swift','url':'https%3A%2F%2Fwww.youtube.com%2Fwatch%3Fv%3De-ORhEE9VVg'},{'title':'Dark%20Horse%20by%20Katy%20Perry','url':'https%3A%2F%2Fwww.youtube.com%2Fwatch%3Fv%3D0KSOMA3QBU0'},{'title':'Fancy%20by%20Iggy%20Azalea%20ft%20Charli%20XCX','url':'https%3A%2F%2Fwww.youtube.com%2Fwatch%3Fv%3DO-zpOMYRi0w'},{'title':'Jealous%20by%20Nick%20Jonas','url':'https%3A%2F%2Fwww.youtube.com%2Fwatch%3Fv%3Dyw04QD1LaB0'},{'title':'Lips%20Are%20Movin%20by%20Meghan%20Trainer','url':'https%3A%2F%2Fwww.youtube.com%2Fwatch%3Fv%3DqDc_5zpBj7s'},{'title':'Love%20Me%20Harder%20by%20Ariana%20Grande','url':'https%3A%2F%2Fwww.youtube.com%2Fwatch%3Fv%3Dg5qU7p7yOY8'},{'title':'Lucky%20Strike%20by%20Maroon%205','url':'https%3A%2F%2Fwww.youtube.com%2Fwatch%3Fv%3DcuYoHikgEro'},{'title':'Night%20Changes%20by%20One%20Direction','url':'https%3A%2F%2Fwww.youtube.com%2Fwatch%3Fv%3DsyFZfO_wfMQ'},{'title':'Really%20Don%27t%20Care%20by%20Demi%20Lovato','url':'https%3A%2F%2Fwww.youtube.com%2Fwatch%3Fv%3Dw7LbW9sXQ5s'},{'title':'Rude%20by%20Magic','url':'https%3A%2F%2Fwww.youtube.com%2Fwatch%3Fv%3DY66j_BUCBMY'},{'title':'Shake%20it%20off%20by%20Taylor%20Swift','url':'https%3A%2F%2Fwww.youtube.com%2Fwatch%3Fv%3DnfWlot6h_JM'},{'title':'Steal%20my%20girl%20by%20One%20Direction','url':'https%3A%2F%2Fwww.youtube.com%2Fwatch%3Fv%3DUpsKGvPjAgw'},{'title':'Umbrella%20by%20Rihanna','url':'https%3A%2F%2Fwww.youtube.com%2Fwatch%3Fv%3DY66j_BUCBMY'},{'title':'Fancy%20by%20Iggy%20Azalea%20ft%20Charli%20XCX','url':'https%3A%2F%2Fwww.youtube.com%2Fwatch%3Fv%3DO-zpOMYRi0w'},{'title':'Chandelier%20by%20Sia','url':'https%3A%2F%2Fwww.youtube.com%2Fwatch%3Fv%3D2vjPBrBU-TM'},{'title':'Ooh%20La%20La%20by%20Britney%20Spears','url':'https%3A%2F%2Fwww.youtube.com%2Fwatch%3Fv%3DNVcSNnqRD0c'},{'title':'Cups%20by%20Anna%20Kendrick','url':'https%3A%2F%2Fwww.youtube.com%2Fwatch%3Fv%3DcmSbXsFE3l8'},{'title':'Roar%20by%20Katy%20Perry','url':'https%3A%2F%2Fwww.youtube.com%2Fwatch%3Fv%3DCevxZvSJLk8'},{'title':'Burn%20by%20Ellie%20Goulding','url':'https%3A%2F%2Fwww.youtube.com%2Fwatch%3Fv%3DCGyEd0aKWZE'},{'title':'Last%20Friday%20Night%20by%20Katy%20Perry','url':'https%3A%2F%2Fwww.youtube.com%2Fwatch%3Fv%3DKlyXNRrsk4A'},{'title':'Don%27t%20Stop%20Believing%20by%20Glee','url':'https%3A%2F%2Fwww.youtube.com%2Fwatch%3Fv%3D1FaJshIWdpU'},{'title':'California%20Gurls%20by%20Katy%20Perry','url':'https%3A%2F%2Fwww.youtube.com%2Fwatch%3Fv%3DF57P9C4SAW4'},{'title':'Up%20All%20Night%20by%20One%20Direction','url':'https%3A%2F%2Fwww.youtube.com%2Fwatch%3Fv%3DJ26jFj_sC4s'}]}" >
src="http://www.animationbuddy.com/Animation/Nature/Rainbows/Rainbow_2.gif" border="0" alt="Click to get cool Animations for your MySpace profile" />
MySpace Codes!
MySpace Codes!
Wednesday, December 31, 2014
Elsa Hair Style!
Hey Girlie Girls! Its the Beauty Queen! And today I decided to show you how to do elsas hair style down below. Well guys gtg bye and Happy New Year!

Tuesday, December 30, 2014
Coconut Beauty!!!!!!!!!!!!!!!!!
Hey Girlie Girls its the Beauty Queen! And today I wanted to show you everything you can do with coconuts for beauty in the picture down below well bye guys xoxo - The Beauty Queen oh and btw im on pinterest now my name is beauty queen.

Monday, December 29, 2014
New Blogs!
Hey Girlie Girls!!!! Its the Beauty Queen and today I wanted to give you the name of some of my new blogs. singing blog , baking blog , Sleepover blog. And here our my other blogs once again that you should totally check out! Stuffed Animals, Travel, Caring for brothers, Cat Care.
Blush Tutorial!
Hey Girlie Girls! It's the Beauty Queen and today I decided to show you my blush tutorial below well hope you enjoy xoxo - The Beauty Queen.

Sunday, December 28, 2014
DIY Berry Lip Stain!
Hey Girlie Girls! Its the beauty Queen! And today I decided to make a berry lip stain. So lets get started! 1st get olive oil black berries and raspberries and pomegranate seeds. So you start off by mashing all the ingredients together accept the pomegranate seeds after you have mashed all the ingredients together you squeeze the pomegranate seeds on the mixture then pour water into bowl and stir.then drain liquid! and there you go you now have a berry lip stain enjoy xoxo - The Beauty Queen!

Thursday, December 25, 2014
Christmas Haul Plus another Youtube Channel!
Hey Girlie Girls Sup? Anyways today I uploaded a Christmas haul and its my 1st video on my beauty channel. My channel is called beauty queen unfourtnetly i have 0 subs so if ur on you tube please sub me. also i made another channel where i blog about toatllly random fun girlieness including singing! and the name of that channel is grace williams zero subs too:( well guys gtg bye Happy Holidays!
Tuesday, December 23, 2014
DIY Pine Cone Wreath!
Hey Girlie Girls! Its the Beauty Queen and today I wanted to show y'all how to make a cute little Pine Cone Wreath! So if you want to know how to make it then look down below. And I also have a picture of the final product just in brown but green and red are better.
What You Need!
1.Pine Cones
2.Oven
3.Red And Green Paint/Paint Brush
4.(Optional) Ribbon + Sissors if ribbon
5.Wreath Form.
6.Baking Sheet/Tin foil.
7.Hot Glue Gun. Step By Step!
1.Put Pine Cones on baking sheet and tin foal.
2. Put in Oven at 250 degrees for an hour to get everything off.
3. Start painting the pine cones let them dry.
4.Start gluing them onto the wreath form.
5. Put ribbon to the top if wanted and ur done!
Saturday, December 20, 2014
DIY cute stuffed animal ornament!
Hey Girlie Girls! Its the Beauty Queen!And today I wanted to show y'all a cute little stuffed animal ornament you could make! So 1st start off by going to a store such as target walmart walgreens dollar tree basically any where to buy a mini stuffed animal that we will be putting on top of an ornament which u will also need to buy plus a hot glue gun and string to hang it on of course! So all you need to do is glue the bottom of the stuffed animal on the top of the ornament of your choice put the string on the stuffed animal tie the ribbon and your done! And sorry guys im not able to show u the final product cuz my blogger account won't work on my phone and this is my idea so their are no pictures online. well guys bye xoxo-The Beauty Queen Have A Wonderful Holiday
 !
!


Monday, December 15, 2014
Cute Christmas Colloge!
Hey Girlie Girls! It's the beauty queen! And today I decided to show u this cute little Christmas Colloge cuz I thought it would look so cute! So anyway what u will need for this activity is Frame,Big enough paper to fit in fame, Christmas stuff,Glue Stick or push pen,Any fun decoration u would like to be on your Colloge btw I say Frame cuz it looks better.So the 1st thing u do is push pen or glue your pictures onto the picture. Then u frame it and ur done. And I have a pic of a zebra 1 that shows I did it but I just glued in onto the paper and outlined it wit scrapbook paper.


Sunday, December 14, 2014
Makeup Box!
Hey Girlie Girls! Its the beauty Queen! And today I decided to show you a good way to store your makeup!
What You'll Need!
Cardboard 9 Pieces!
Sissors if you don't have card board straps already cut.
Super Glue!
(Optional)Duct Tape Special Touch.
Step By Step!
1. Make three rectangle boxes with bottoms and glue them.
2.If wanted add Duct Tape or special Touch to box.
3. Put makeup in and your done! Hey Girlie Girls! Thanks for checking out my blog! I know this is a similar DIY that a once did put it would be cool to have 2 different looking boxes wouldn't it?
Saturday, December 13, 2014
Bottle Cap Bow!
Hey Girlie Girls its the BeautyQueen! And sorry I didn't post yesterday literally right after I got home from school I went straight to my friends house for a sleepover.Which we also filmed vids so if you wanna see us having fun and some things we did go to you tube type animal jam genius in click on the 1st channel that pops up then watch the 2 lastest vids i have posted:) So anyways today I decided to show y'all how to make a bottle cap bow.
What You'll Need
1.Bottle cap.
2.Ribbon.


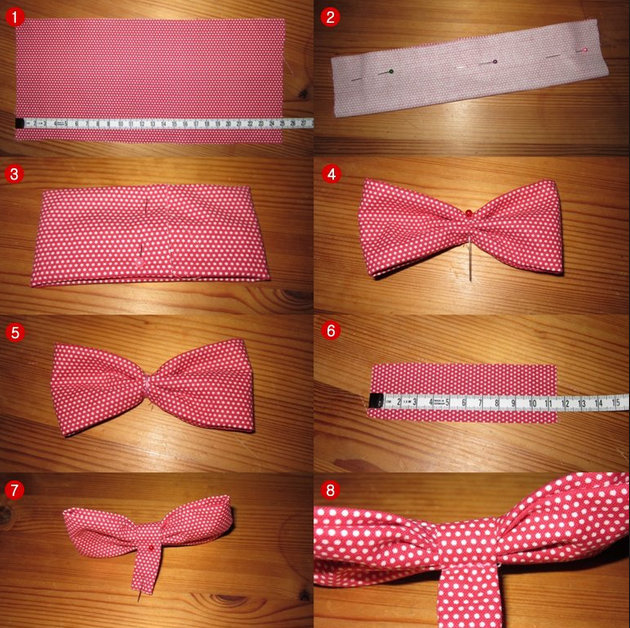


What You'll Need
1.Bottle cap.
2.Ribbon.
3.Hot Glue/Gun for hot glue.
4.Anything you would like to add to costumize your bow.
Step By Step!
1.So 1st make your Bow.
2. Costumize bottle cap if wanted.
3. Hot glue bottle cap on decorate bow and boom your done!
Thursday, December 11, 2014
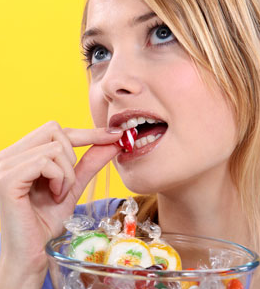
DIY Candy Frame!
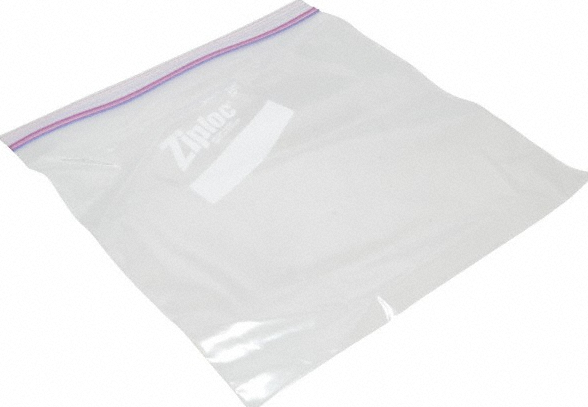
Hey Girlie Girls! And today this DIY is an idea I got from my friend not this exact idea but something like it so. Today I thought of this really cute DIY. So if you love candy or if you like the idea of candy you will love this project! So what you do is eat enough candy to fit into a square frame or get candy rappers for it or have someone else eat the candy or even better yet just get a plastic bag put the candy in and save it.
What You'll Need
1.Candy with rappers.
2.Frame.
3.Glue or tape glue probs works better.
Step By Step!
1.Eat or have someone eat/save candy btw save rappers.
2.Glue/tape rappers that fill up the whole frame.
3.Then frame it hang it on the wall and there you go!
Hey Guys! Thanks for reading my blog. Hoped you enjoyed todays DIY btw sorry for not posting in too days I just couldn't really.
Subscribe to:
Posts (Atom)